By Carl Spiess
On the weekend of Jan 18th, I was lucky to have an expert visit our cottage in Key Harbour. Chris is a trainer & Ice Rescue Technician with the Arctic Rangers, and spends many months of the year in our far north teaching cold water survival & rescue.
His speciality is cold water rescue training, and after a discussion (and a few drinks) on Friday night, I had committed to jumping into the Key River on Saturday afternoon.
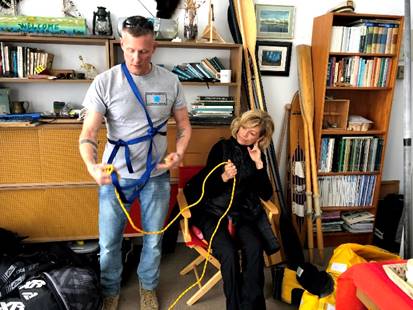
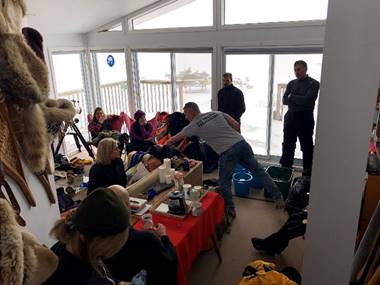
First though on Saturday morning, it was lesson time. A dozen weekend visitors jammed into our living room for training class. Here are some of the lessons we learned.
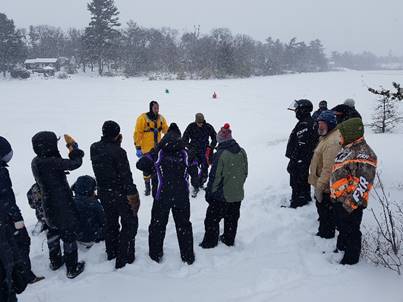
Prioritize. If someone goes through the ice, and you are nearby and want to help, remember these 3 priorities. You are the #1 most important person to keep safe. If you go through then there are two victims. (Remember that most of the time when a dog falls through the ice, the rescuers get to the scene and find the dog fine and the owner in the water!) The #2 priority is to keep the public safe. If 15 people start walking out on the ice to help, suddenly you will have 16 victims. The #3 last priority is actually the person in the water!
1-10-1. If you fall through the ice, you have 1 minute to get your breathing under control. If you are struggling, and inhale water when your cold water gasp shock reflex kicks in, you will get water in your lungs. Be prepared that you will gasp in the first minute. So relax, you actually have 10 minutes where your arms will still work well, although you will lose finger dexterity quickly. You then still have up to 1 hour before hypothermia actually shuts you down. If you get to that point, freeze your arms to the ice so if the rescuers arrive shortly after they can resuscitate you (or at least find you.)
To get out, STAY HORIZONTAL. Basically, swim front crawl with your arms on the ice, and kick with your legs. Or do the back crawl and then roll when your shoulders are on the ice. Ice picks help, but you can actually make hand holds out of the slush. I found that trying to stick a slush snowball right close to the edge, it would melt in the nearby water. At the far end of my reach, the snow was too white and crisp. But around 30-40cm from the edge, a slush ball made between my hands quickly firmed up into a handhold and it was easy to pull myself out. Of course, ice picks work well too, but only if you keep yourself floating horizontal, not vertical. You can use your helmet for floatation (stick it under your butt) as it has a lot of styrofoam in it.
Here’s another tip. If you fall in, TURN AROUND to where the ice was thicker. Many people who fall through the ice just keep going the direction they were going and toward thinner ice!
If you are rescuing someone, the best way is to use a THROW ROPE. That way you can stay away from the edge. We learned that even if the person can’t grab the rope with their numb hands, throwing the rope over their shoulder and having them spin their arms (one above the rope, one below) like they are an official calling “travelling” in basketball. That will wrap the rope around their forearms and they can easily be pulled out. It is an amazing tip!
Avoiding venturing out alone is a big safety tip. But when you do stop, don’t stop your machines close to each other on questionable ice!
Onto safety gear. Of course, the above lessons become easier if you have the right gear. We now have throw ropes accessible on all our sleds.
www.amazon.ca/Fox-40-Rescue-Throw-Bag
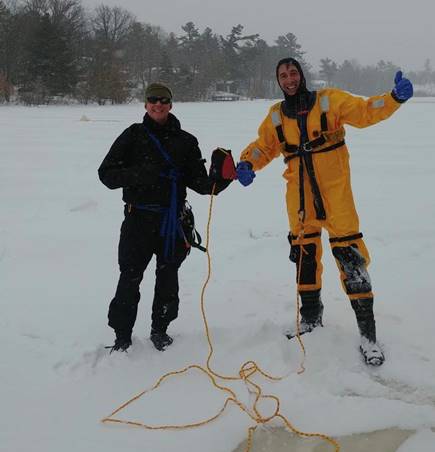
A floater snowmobile suit is a must. That extra flotation really helps. (The suit I was loaned in this video is a $5,000 cold water survival suit that is beyond what anyone needs.)
A GPS device like SPOT GPS will let you call for help even if it is wet or there is no cell service:
https://www.findmespot.com/en-ca/products-services/spot-gen3 It requires a subscription but is a great safety backup.
An ice screw can help you secure a rope and pulley for extracting someone or winching a snowmobile.
https://www.mec.ca/en/product/4018-379/Turbo-Ice-Screw
Of course, not falling through the ice is the best bet.
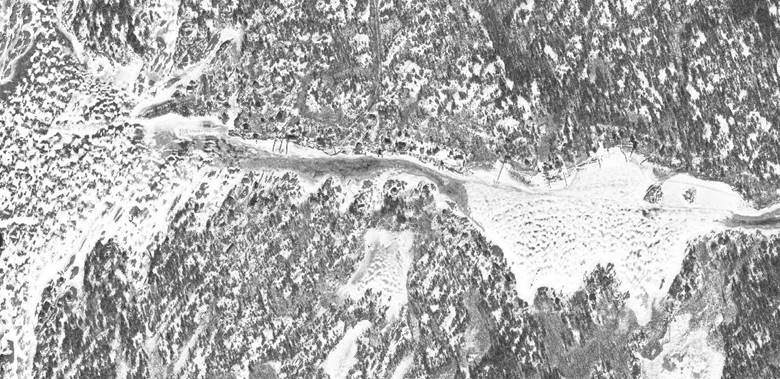
Here is a link to some images from a few years ago:
https://www.mapquest.ca/?center=45.883107595757345,-80.70221900939941&zoom=12&maptype=map
(click zoom once and then the satellite globe image to see, as below)
You can see where the ice melts first, and where it stays into April. Each year will be different, especially this year with the high water, but the narrows and anywhere there are buoys is somewhere to avoid!
(from the KRAA Members Private Facebook Group – Jan 12,2020)
With the winter storm yesterday, the Key area received considerable snowfall. The temperature is well below freezing. You may be curious as to the amount and quality of the ice.
The KRAA does NOT make recommendations as to the safety of ice or report on ice conditions on the Key River and surrounding areas of Georgian Bay. If you go, it is up to you to do your own research, take the proper precautions and travel safely in and out of the area.
Here are some tips for you when considering whether to take a winter trip in the area.
Follow all the usual safety precautions while on a winter trip to the Key, including:
This is not an exhaustive list of winter ice safety. More ice safety tips can be found at:
Canadian Red Cross: https://www.redcross.ca/training-and-certification/swimming-and-water-safety-tips-and-resources/swimming-boating-and-water-safety-tips/ice-safety
Insurance Bureau of Canada: http://www.ibc.ca/on/disaster/ice/ice-safety-tips
Adventure Smart: https://www.adventuresmart.ca/water/icesafety.htm